Gallery Walls 2026: Stunning Visual Impact Guide
Advertisements
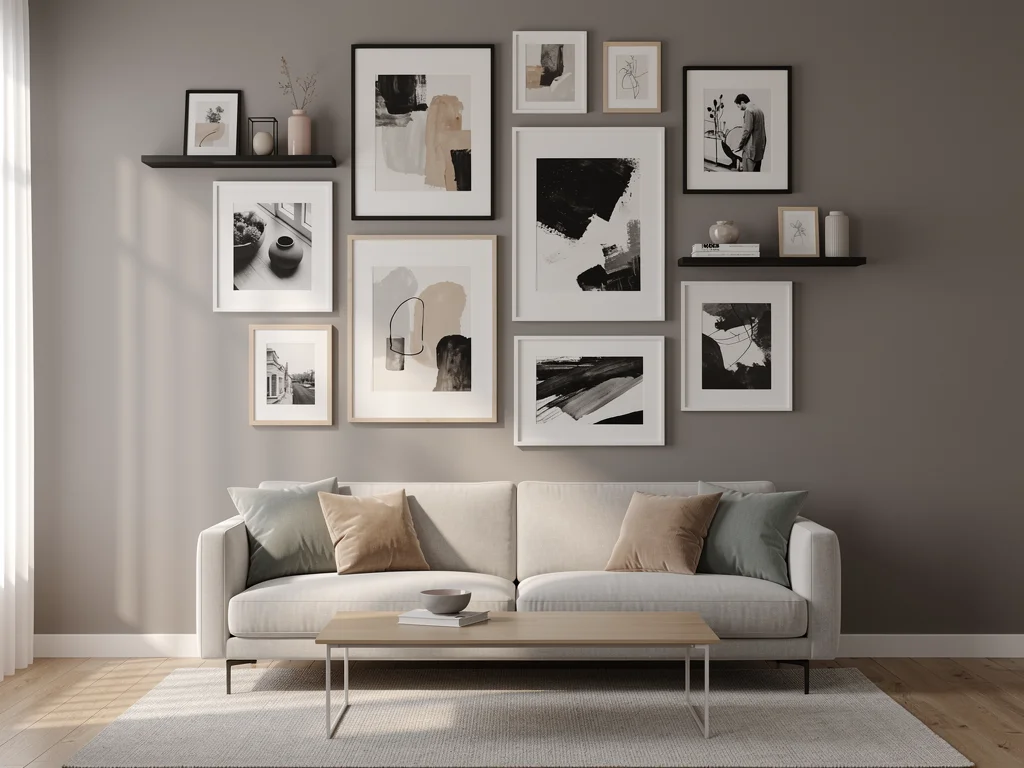
Creating a captivating gallery wall in 2026 involves thoughtful planning, strategic artwork selection, and precise installation to achieve a personalized and visually impactful display that enhances any living space.
Are you ready to elevate your home’s aesthetic and inject a dose of your unique personality into your living space?
The Art of Gallery Walls: A Step-by-Step Guide for Stunning Visual Impact in 2026 is your ultimate resource.
This guide will walk you through transforming a blank wall into a captivating focal point that tells your story and inspires conversation.
Understanding the Gallery Wall Concept
A gallery wall is more than just a collection of framed items; it’s a curated visual narrative. It involves arranging various pieces of art, photographs, mirrors, and even three-dimensional objects in a cohesive display.
The beauty of a gallery wall lies in its versatility and the endless possibilities for personalization.
In 2026, the trend leans towards intentionality and individuality, moving beyond simple grids to more dynamic and organic compositions.
It’s about creating a harmonious blend of textures, colors, and subjects that resonate with your personal style and the overall ambiance of your home.
The Evolution of Wall Decor
Historically, wall decor often consisted of single, prominent pieces.
However, the modern gallery wall emerged as a way to display multiple smaller pieces, making art collecting more accessible and allowing for a richer, more layered aesthetic.
This approach has gained significant traction, becoming a staple in contemporary interior design.
- Personal Expression: Gallery walls offer an unparalleled opportunity to showcase personal tastes and memories.
- Dynamic Displays: Unlike single art pieces, gallery walls can evolve over time, with new additions and rearrangements.
- Space Optimization: They effectively fill large wall spaces, turning otherwise blank areas into engaging visual experiences.
Understanding the core concept of a gallery wall empowers you to approach its creation with a clear vision, ensuring the final result truly reflects your intentions and enhances your living environment.
This foundation is crucial for building a display that not only looks good but also feels deeply personal and meaningful.
Planning Your Gallery Wall Layout
The planning stage is arguably the most critical step in creating a successful gallery wall.
Before you even think about hammering nails, you need a clear vision for how your pieces will interact and flow together.
This involves considering the space, the items you wish to display, and the overall aesthetic you want to achieve.
Start by identifying the wall you want to transform.
Is it a large, empty expanse, a narrow hallway, or a section above a sofa?
The size and shape of your wall will significantly influence the scale and arrangement of your gallery.
Don’t underestimate the power of a well-planned layout to make even disparate items feel cohesive.
Gathering Your Art and Objects
Begin by collecting all the pieces you intend to include.
This might involve existing artwork, cherished photographs, vintage finds, or new acquisitions.
Lay everything out on the floor or a large table to get a sense of their individual characteristics and how they might complement each other.
Consider a mix of mediums and styles for added visual interest.
- Variety in Size: Incorporate a range of frame sizes to avoid a monotonous look.
- Color Palette: Decide if you want a monochrome scheme, a vibrant mix, or a subtle blend of complementary colors.
- Thematic Cohesion: Even with diverse items, try to find a common thread or theme to tie them together.
Mapping Out Your Design
Once you have your pieces, it’s time to experiment with the layout.
Cut out paper templates of each frame and object, labeling them for easy reference.
Tape these templates to your wall using painter’s tape, allowing you to rearrange them as many times as needed without damaging the surface.
This method provides a visual blueprint and helps you fine-tune the spacing and balance.
Pay attention to the negative space around your pieces; it’s just as important as the items themselves.
Aim for a visually pleasing balance, whether it’s a symmetrical, asymmetrical, or organic arrangement.
Step back frequently to assess the overall composition from different angles and distances.
Selecting Your Artwork and Frames
The selection of artwork and frames is where your gallery wall truly begins to take shape, reflecting your personal taste and the desired mood of the room.
It’s an opportunity to tell a story, evoke emotions, and create a focal point that captivates.
Don’t rush this process; thoughtful choices lead to a more impactful display.
Consider the existing decor of your room.
Are you going for a bohemian vibe, a minimalist aesthetic, or something eclectic?
Your art and frames should complement or intentionally contrast with your current furnishings and color scheme.
This harmony ensures your gallery wall feels integrated, not just tacked on.
Mixing and Matching Styles
A truly dynamic gallery wall often features a blend of styles, mediums, and subjects.
Don’t be afraid to combine abstract paintings with black and white photographs, or modern prints with vintage pieces.
The contrast can create visual intrigue and prevent the display from feeling too static or predictable.
- Personal Photos: Integrate cherished memories with professional art for a personal touch.
- Textural Elements: Include woven wall hangings or small shelves with decorative objects.
- Mirrors: Use mirrors to reflect light and make the space feel larger and brighter.
Choosing the Right Frames
Frames play a crucial role in unifying your gallery wall.
You can opt for a cohesive look by using all matching frames, or create an eclectic feel with a mix of styles, colors, and materials.
When mixing frames, try to find a common element, such as a similar tone of wood or a consistent metallic finish, to maintain some visual order.
Matting can also greatly enhance your artwork.
A white or off-white mat can create a clean, classic look, drawing the eye to the artwork itself.
Colored mats can add a pop of color or tie into other elements in the room.
Experiment with different matting options to see what best elevates each piece and contributes to the overall aesthetic.
Arrangement Strategies and Principles
Once you have your art and frames, the next step is to arrange them in a way that is both aesthetically pleasing and structurally sound.
This involves understanding various arrangement strategies and applying fundamental design principles to create a harmonious and impactful display.
A well-arranged gallery wall feels balanced and intentional, guiding the viewer’s eye smoothly across the composition.
There’s no single ‘right’ way to arrange a gallery wall, as it largely depends on your personal preference and the specific pieces you’re working with.
However, certain principles can help you achieve a professional and polished look.
Think about how each piece relates to its neighbors and to the wall as a whole.
Popular Layouts and Techniques
- Grid Layout: This classic, symmetrical approach involves arranging frames in perfectly spaced rows and columns. It’s ideal for a clean, ordered aesthetic, often using frames of the same size.
- Salon Style: An eclectic, free-form arrangement where pieces are clustered more organically. This style allows for a mix of sizes and shapes, creating a dynamic and visually rich display.
- Edge Alignment: Aligning all pieces along a central horizontal or vertical line, even if they vary in size, can create an interesting and subtle sense of order amidst variety.
Achieving Balance and Flow
Regardless of the layout you choose, balance is key.
This doesn’t necessarily mean perfect symmetry, but rather a visual equilibrium.
Distribute larger, heavier pieces evenly throughout the wall, and use smaller items to fill gaps and create visual pathways.
Consider the ‘visual weight’ of each piece; a dark, bold artwork will have more visual weight than a light, airy photograph.
Creating flow involves ensuring the eye moves naturally from one piece to the next.
You can achieve this through consistent spacing, a unifying color scheme, or by arranging pieces around a central focal point.
Stepping back and observing your arrangement from a distance will help you identify areas that might feel too crowded or too sparse, allowing you to make necessary adjustments before permanent installation.
Installation Techniques and Tools
With your layout finalized, the installation phase brings your gallery wall to life.
Proper techniques and the right tools are essential to ensure your artwork is securely mounted and precisely positioned, preventing damage to your walls and ensuring a professional finish.
Accuracy and patience are your best allies during this stage.
Before you begin, gather all necessary tools.
Having everything at hand will streamline the process and reduce frustration.
A little preparation here goes a long way in achieving a perfect result.
Remember that precision in measurement is paramount for a polished look.
Essential Tools for Installation
- Level: Crucial for ensuring frames are perfectly straight.
- Measuring Tape: For accurate spacing between frames and from the floor/ceiling.
- Pencil: To mark hanging points on the wall.
- Hammer or Drill: Depending on your wall type and chosen hanging hardware.
- Picture Hanging Hooks/Anchors: Select appropriate hardware based on the weight of your frames.
- Painter’s Tape: For securing paper templates and for marking.
Step-by-Step Installation Process
Start by taping your paper templates to the wall in your chosen arrangement.
Use a level to ensure each template is straight.
Once satisfied with the placement, mark the exact hanging point for each frame directly onto the wall, typically through the hanging mechanism on the template.
Double-check all measurements before making any holes.
Carefully remove the paper templates.
Then, using your marks as a guide, install your chosen picture hanging hardware.
For heavier frames, use wall anchors to ensure maximum security.
Finally, hang your artwork, using your level one last time for each piece to guarantee it’s perfectly straight.
Take your time, and don’t hesitate to make minor adjustments until every piece is exactly where it should be.
Maintaining and Evolving Your Gallery Wall
A gallery wall is not a static installation; it’s a living, breathing display that can evolve with your tastes, memories, and home decor.
Maintaining its pristine appearance and periodically updating its content ensures it remains a fresh and engaging focal point in your home for years to come.
Regular care and thoughtful additions will keep your wall vibrant.
Just as you dust your furniture, your gallery wall also benefits from routine cleaning.
Dust can accumulate on frames and artwork, dulling their appearance.
A soft, dry cloth is usually sufficient for cleaning frames and glass surfaces.
For more delicate or valuable artwork, consult a professional for specific cleaning recommendations.
Refreshing Your Display
Over time, you might find yourself wanting to refresh your gallery wall.
This could involve swapping out a few pieces for new acquisitions, rearranging the existing layout, or even introducing new elements like small shelves or plants.
The beauty of a gallery wall is its adaptability; it can change as your style evolves.
- Seasonal Updates: Incorporate seasonal art or photos to reflect holidays or changing seasons.
- New Memories: Add new family photos or travel souvenirs as they are created.
- Thematic Shifts: Gradually change the theme or color palette of your wall to match a room renovation or new aesthetic preference.
Troubleshooting Common Issues
Even with careful installation, minor issues can arise.
Frames might shift, or a piece might become slightly askew.
Keep a small level handy for quick adjustments.
If a frame consistently hangs crooked, consider reinforcing its hanging wire or using additional adhesive strips designed for picture hanging to keep it in place.
If you notice any fading in your artwork, especially photographs, consider placing them away from direct sunlight or using UV-protective glass for framing.
Addressing these small issues promptly will preserve the beauty and integrity of your gallery wall, ensuring it continues to bring joy and visual appeal to your home.
| Key Aspect | Brief Description |
|---|---|
| Planning & Layout | Critical initial step involving space assessment and paper templates for visual arrangement. |
| Artwork Selection | Choosing diverse pieces, frames, and mats to reflect personal style and room aesthetics. |
| Installation | Using proper tools like levels and appropriate hardware for secure and precise hanging. |
| Maintenance | Regular cleaning and periodic updates to keep the gallery wall fresh and engaging. |
Frequently asked questions about gallery walls
To choose a theme, consider your personal interests, hobbies, or the existing decor style of your room. Themes can range from a specific color palette, travel memories, nature, or a mix of abstract and figurative art. A cohesive theme helps unify diverse pieces into a harmonious display, making your gallery wall feel intentional and curated.
When arranging frames of different sizes, start with a central anchor piece, typically the largest or most prominent. Then, build around it, ensuring even distribution of visual weight. Using paper templates taped to the wall allows you to experiment with various layouts, like a salon style or an organic cluster, before making any permanent holes.
The ideal spacing between frames is typically 2 to 4 inches. This distance provides enough breathing room for each piece to be appreciated individually while maintaining the overall cohesion of the gallery. However, this can vary based on the wall size and the desired aesthetic; tighter spacing creates a denser, more impactful look, while wider spacing feels airier.
Absolutely! Incorporating objects like small mirrors, decorative plates, wall sculptures, plants, or even small shelves can add texture, depth, and unique character to your gallery wall. These non-traditional elements break up the monotony of flat frames and create a more dynamic, personalized, and visually interesting display that truly tells your story.
To ensure your gallery wall is level, use a good quality spirit level for every single piece you hang. After marking your hanging points with paper templates, double-check the marks with your level before drilling or hammering. For added stability, especially for heavier frames, consider using two picture hooks for each frame, ensuring they are perfectly aligned horizontally.
Conclusion
Creating a stunning gallery wall is a rewarding endeavor that significantly enhances your home’s aesthetic and reflects your unique personality.
By following this comprehensive guide, from meticulous planning and thoughtful selection of art and frames, to precise installation and ongoing maintenance, you can transform any blank wall into a captivating visual story.
Embrace the journey of curation and enjoy the lasting impact of a beautifully designed gallery wall that truly makes your house feel like a home.